- Step one: carefully look over your linens in bright sunlight. Hold them up to the light. I am always surprised at what is revealed in a careful inspection. Sometimes I spy a moth hole or a frayed hem that is easily repaired. Other times, there are signs of age or stains that were never treated properly the first time.
- I begin my age spot and stain treatment with a q-tip treatment of half bleach and half water mixed in the bleach container cap. I have learned the hard way not to have too much bleach anywhere near the linens so I use the cap and replenish it as needed. I take the q-tip and moisten the end slightly and then gently roll the q-tip over the darkened area(s). I do this next to my kitchen sink because as soon as the stain begins to lighten (keep rolling the q-tip over the affected area and wait patiently for a minute or two) immediately put the treated area under running water to retard the process. If you do not do this, the bleach will continue to act and can literally cause your most fragile linens to disintegrate (another thing I learned the hard way!)
- After I have rinsed the bleach from the treated areas, I put the linens in a gentle overnight soak in in the sink with a mixture of Gain detergent or Cascade dishwasher detergent and Oxyclean. You will need to use about 1/5 of what you use in your washer or less. The key for me is that the cleaning solution should not feel slimy. If it feels slimy, you are using too much detergent!
- I inspect the linens again in the morning, rinsing them clean and treating again using the process outlined above, if necessary. Gently squeeze as much moisture as you can from the linens but do not wring them dry.
- Spread your linens out to air dry (preferably outside where they will naturally stiffen as they dry). Under NO circumstances should you use an automatic dryer as the rolling drum can damage your delicate items. I use the sunshine as a natural bleach, and if I still detect yellowing, I will sometimes squeeze a lemon over the linen as well to aid in the process.
- To finish my linens, I steam iron them carefully and follow up with some heavy starch.
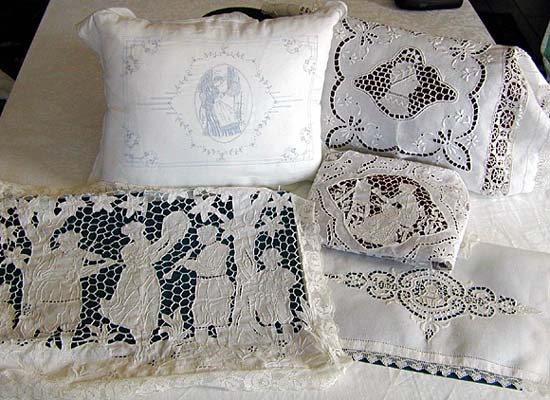
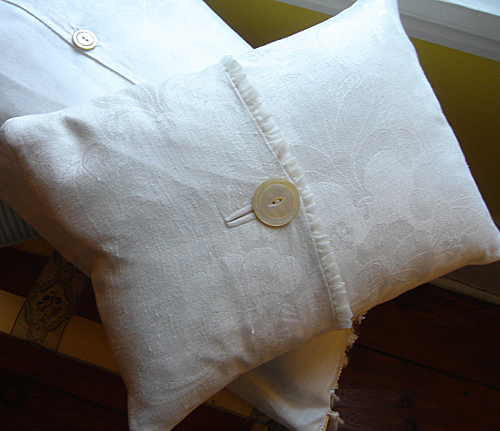
These vintage linens make perfect little pillows
This has to be one of my favorite ideas! This lampshade is definitely creative as well as fun!

You can always display your linens in a guest bedroom

Or just stage them in a simple basket


Don't keep them tucked away in a closet, you'll enjoy your collection
so much more if you find a way to enjoy your antique linens every day!
Don't forget to stop by Gaslamp Too on Powell Place in Nashville on August 8th.
We'll be open for business that day. Hope to see you there.
I am booth 366 -- near the back on the right hand side!
The Feathered Nest!
No comments :
Post a Comment
Thank you for taking the time to comment. We appreciate your input and feedback! Have a blessed day!