https://static.cliqueme.com/cliqueme-latest.min.js
Showing posts with label projects. Show all posts

Friday, September 21, 2012

Teaching An Old Dog New Tricks

They say you can't teach an old dog new tricks, but I keep trying. I am the old dog in this equation. And I have just undertaken my first real attempt to UPHOLSTER a chair. It's turning out to be a hair-raising experience. Over the years, I have, of course, recovered the seats of my dining room chairs (multiple times, I might add) and sewed a cushion or two, but I have never ever entered this heretofore uncharted territory.

These are the things I have already learned:

  1. My newfound friends at the  Gaslamp Too Antique Mall told me it was easy. I don't want to say that they lied, but they are definitely young things and not an old dog.
  2. They advised me to get a decent staple gun. I hope I followed their instructions. I don't know yet. But they didn't tell me that I would need anything else and thus far, I have had to use the following implements: needlenose pliers (I had to go buy these), a very teeny tiny flat head screwdriver (I looked in five or six drawers and two closets before I found one), a pair of tweezers (sadly I used one of my nice Tweezerman brand tweezers because I needed a sharp tip, and this one is no longer going to be able to go anywhere near my face again), and a hammer.
  3. I did NOT want to sew anything in this project so I purchased something called "gimp" to finish the edging around my chair. This is what I will use in lieu of corded piping. I always knew gimp as a person with a limp but apparently it is also a flat trim of silk, wool that is used for fabric finishing or ornamentation. So there. Now you know another meaning for the all-important word gimp.
  4. The guts of a chair are not pretty. Especially when said chair has been recovered multiple times. The chair has to get naked again and that can be a painful and tedious process. I can identify with this aspect.
  5. I found out that I loathe removing staples. I am sure that professional upholsterers and other savvy DIY folks have this down to a science, but I was immediately dismayed when I realized I was dealing with staples over staples over staples, and I would not be able to use my new staple gun unless I removed about a bajillion staples.
  6. Totally Random Information: Did you know that rocker Jack White of White Stripes fame was an upholsterer? I have it on good authority from my own upholsterer who told me that Jack had shown him his equipment and tons of fabric. Apparently if Jack had not "made" it in the music scene or were to fall on hard times, he planned to go back into the upholstery business. I find this somewhat hysterical. So while I spent the better part of this morning removing staples upon staples from the chair, I thought about Jack White doing the same. It got even funnier. Then I came inside and dialed up some White Stripes and Raconteurs on the Pandora station. It is definitely not my kind of music, but after about a bajillion staples, Jack and I got in the groove. 
  7. I thought upholstering a chair would involve four steps: removal of the original fabric, cutting new fabric to fit using old fabric as a template and then stapling on the fabric and glue gunning (I don't think that this is a real verb, but it just became one) the gimp. (There's that other word for you.) At this point, I have just finished most of the staple removal on the top part of the chair and it has been about 3.25 hours. I still have the bottom part of the chair to do. Then I have to sand. And paint. And sand and paint the chair again. Then I have to make the template. Goodness knows how this is going to go. And then...I think you are getting the gist of this.
  8. I do like my fabric. As I keep getting discouraged and thinking about abandoning what has become a tedious and time-consuming project, I keep looking at the fabric. It helps. Otherwise the chair is going to the dump.
  9. Oh, and the previous owners had a dog or a cat or both. I intended to use the original foam, but now I have discovered that this will have to be replaced...yet another step. Yikes, I think foam is expensive. I am definitely not going to tell The Husband how much my little DIY foray is costing me/him.
  10. I may never show you the finished product. It depends. If it turns out reasonably well, I'll post a pic. Otherwise, I will just let you use your imagination.
  11. I think it was my imagination that got me into this mess in the first place.
  12. What WAS I thinking? Oh wait, I wasn't thinking...I was dreaming.
I am afraid that this is what I am going to look like when I finally finish my chair....

Friday, July 6, 2012

Assembling a Craft Kit for Toddlers

    When my oldest grandchild comes to visit we love to read books, dance to music, play our own music and mess around with a hose and a bucket of water, among other things. We also play endlessly with The Daughter's dollhouse, creating make believe lives for the mother bunny and the two babies who live in the house. The Husband commented to me recently that Little One has already, in her short lifetime, enjoyed the dollhouse far more than The Daughter ever did. When The Daughter and I talked about it, I realized that when Little One or Little Two come to visit, they are my sole priority. The cooking and cleaning and endless list of chores are put on hold until they leave. They have my complete and undivided attention, something I was rarely able to give my four children (I had three under four) when they were growing up. I don't feel bad about it. It was my life as I knew it. But life with grandchildren is different. And I am very thankful for that fact.
   This past week I picked up a few craft items to begin to put together an art box for Little One and Little Two. I don't want to assemble too many items -- just enough to spark the imagination. Here's what I plan to have in my box.
Nonna's Toddler Craft Kit
1. A non-toxic glue stick. This one by Coccoina looks perfect! It has no petroleum or solvents and washes off easily with water. I found a great price at greeapplesupply.org
Coccoina Glue Stick, Single
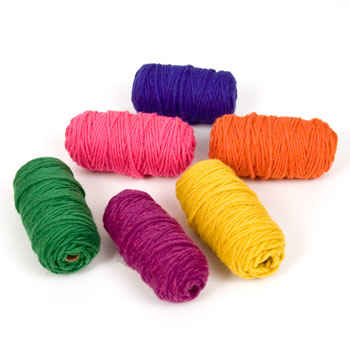
2. Brightly colored yarn. 
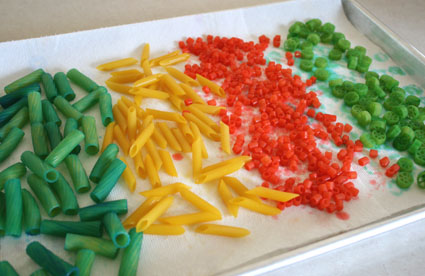
3. Ziplock bags with dyed pasta shapes (mararoni and rotini). I will use these in lieu of wooden beads. I love colored wooden beads, but there is too much of a temptation for these to end up in little mouths. I remember from my preschool days that they are a lot less likely to eat a hard piece of pasta. 
http://www.makeandtakes.com/coloring-pasta-making-necklaces
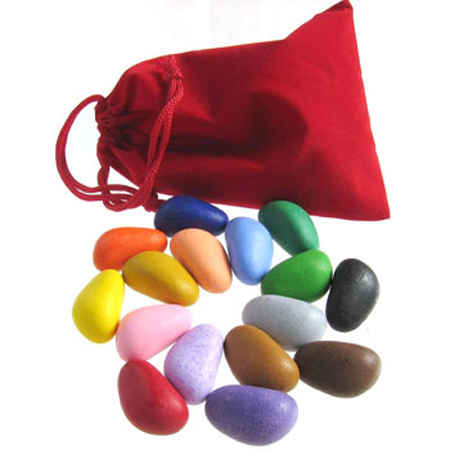
4. Crayons. I am not going with the typical crayons. I found these amazing soy based (which means they are softer) crayon rocks at the woodenwagon.com. They will be perfect in my craft box.
Crayon Rocks Student Bag of 16 colors
5. 10 Small Brown lunch bags. You know the garden variety type. Preferably plain and constructed of recycled paper. We will use these for puppets or storage. This Elmo is darling, but he is a lot more complicated that what I have in mind!
Elmo Paper Bag Puppet
6. Assorted colored squares of felt
7. Pom poms and pipe cleaners. I found a good deal on these at gramcoschoolsupplies.com
Pom Poms Pounder Giant bag
Chenille Craft Pipe Cleaners 12"  100 pack
8. Cotton balls. For clouds, of course, and sheep and hair!
9. 10 paper plates. No explanation necessary!
Paper Plate Craft Sun

10. Non-toxic washable markers. I found these at stubbypencilsstudio.com. The nice thing is that if they start to dry out, you simple soak the tip in a little water and they renew themselves!
Washable Markers

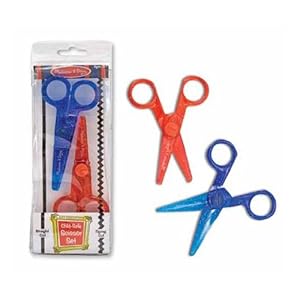
11. Blunt tip scissors. Apparently, these from Doug and Melissa actually do the trick. So many are too lightweight or too blunt to actually cut a piece of paper. Even though these are safety scissors, they should remain in their special container and only be used under direct supervision. It's just too easy to cut hair or clothes or something else when Nonna is not looking! Available at amazon.com
Melissa & Doug Child-Safe Scissor Set
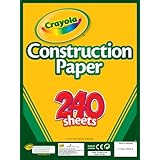
12. A pack of construction paper, white paper and an assortment of cardboard pieces. Available from amazon.com
Product Details


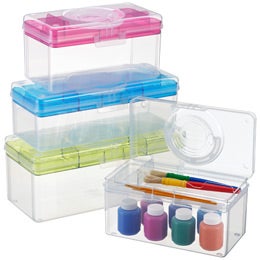
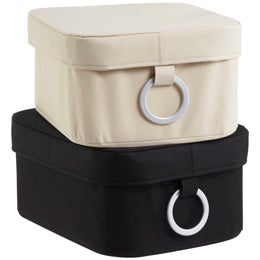
13. A fun container! No totes for me! I want something that has a closed top, a handle and a clasp that requires adult assistance to open!  Both of these options are available at The Container Store


Feel free to add additional items to your toddler craft box. I left out paints because we already have an easel available for painting projects. Another tip: if you put a craft box together for your child or grandchild, why not do two? Then you can give one away as a gift. Some lucky mother or Nonna will thank you later!

Here are some pictures of Little One crafting on her last visit to Nonna's. She is assisted by her Pappy, aka The Husband!